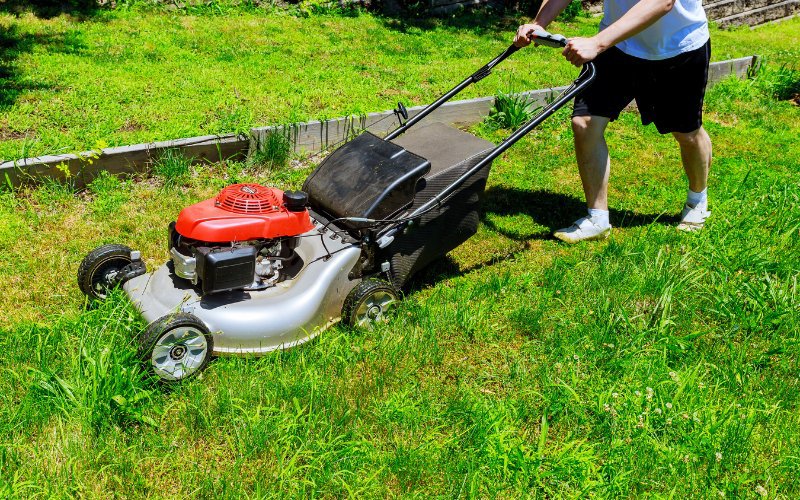
Is your self-propelled lawn mower weak, moving slower than usual, requiring a push, or just refusing to work?
If this is the case, it is more than likely a problem with the drive. Unfortunately, this is a common problem self-propelled mowers face, regardless of their make or model.
Luckily it should be a simple fix. So, grab your tool bag, and let’s figure out exactly where the problem lies.
Why is Your Self-Propelled Lawn Mower Moving Slow? (The Short Answer)
Self-propelled lawn mowers use a drive mechanism that transfers the energy from the driveshaft to the wheels.
A defect in any of the components within the mechanism can cause the lawn mower to gradually lose speed over time and then completely stop altogether.
This can include components such as the cable, belt, gears, and wheels.
Diagnosing a Self-Propelled Lawn Mower That is Moving Slow or Not At All
Now that you know where the problem could lie, you’ll need to take a closer look to pinpoint it.
So, let’s check the individual components and see which of these is causing the lawn mower to move slowly or if the self-propel is not working on the mower.
Drive Cable
The drive cable connects the handle drive control lever to the transmission. The cable can snap, but, more commonly, it can freeze up inside the cable sheath, or the attached spring stretches out.
So, you need to gain access to where the cable connects to the transmission to inspect it.
This connection can usually be found under the lawn mower. Once you locate the transmission and the cable connection point, check to see how much slack there is in the cable.
If it is very loose, then the cable sheath or the spring attached has likely stretched out and will need replacing.
If you give it a tug, you’ll soon find out if it has snapped as the cable will continue pulling from the sheath.
So, pull the drive control lever and check to see how the cable moves and rotates the transmission. If there isn’t much movement in the transmission, then you will need to replace it with a new cable.
The Drive Belt
The drive belt will inevitably stretch out over time and cause your lawn mower to move slowly.
To check the belt, you first need to look under the mower and find its location. Just remember to tilt the lawn mower over the correct way so that oil doesn’t leak through to the air filters.
Once you find the belt, give the drive control lever a pull and check to see if the belt tightens up.
Pulling the drive control lever should add enough tension to the belt and tighten it against the crankshaft and transmission pulleys.
If it’s still loose, then you will need to replace it with a new drive belt.
Drive Wheel
Located inside the wheel of a self-propelled lawn mower, you’ll find a pinion gear hidden away. This tiny gear transfers the power from the transmission to the wheel.
Usually, the wheels have a gear incorporated into them and are made of toughened plastic, unless you have a mower like a Honda, which uses a metal version.
It’s common for the gears to lose a tooth or two and slow down the drive. This is felt as a jerky and slower drive.
So, to check the pinion gear and wheel, you’ll need to pop off the wheel and check inside. If you find that the teeth are worn down or a few are missing, you’ll want to replace the wheel.
Self-Propelled Transmission
The final part of the drive’s mechanism is the transmission. Transmissions tend to wear down over time and become difficult to turn. Resistance in the transmission causes the drive belt to lose power and speed.
To check the transmission, you will need to lift the propelled wheels off the ground and turn the wheel manually. Make sure the drive control lever isn’t engaged, and give the wheel a spin.
Both wheels should turn together and be pretty easy to turn. The only resistance you should feel is the transmission’s weight, which should be next to nothing.
Just make sure that the belt isn’t rubbing too much when you spin the wheels and that no weight is on the wheels. If you find the wheels hard to turn, you’ll want to replace the transmission.
How to Fix a Self-Propelled Lawn Mower That is Moving Slow
Hopefully, one of the components was the cause of your self-propelled lawn mower moving slowly or your self-propelled lawn mower not working.
If it was, then let’s take a look at the steps, tools, and parts you’ll need to fix each of the issues.
Safety First
Before carrying out any repairs to your lawn mower, it’s important to keep safety in mind and take the appropriate steps. So, remember to wear your gloves and protective eyewear to keep yourself safe.
Also, keep in mind that lawn mowers can be hot, have sharp surfaces, and contain hazardous liquids. Finally, always remove the ignition cable to prevent mishaps and tilt your lawn mower over the correct way.
Replacing the Drive Belt
The drive belt is going to be the most common problem causing your self-propelled lawn mower to be moving slowly or not propelling at all, so we’ll start here.
Tilt Over the Mower
First, tilt over the lawn mower the correct way to gain access to the bottom of the lawn mower.
Remove the Shroud
Next, use your socket wrench to remove the bolt holding on the shroud on the bottom of the mower. This will give you access to the belt.
Remove the Engine Belt Guard
Located next to the driveshaft, you’ll find a belt guard. You’ll need to remove this using your socket wrench set, then set it to one side.
Remove the Transmission Belt Guard
You’ll find another belt guard on the rear of the lawn mower connected to the transmission. Remove this the same way you removed the engine belt guard and set it to one side.
Remove the Old Belt
With both of the guards removed, you should be able to lift the belt off from the pulleys and slide it over the blade.
Install the New Belt
Next, take your new belt and slide it onto the lawn mower the same way you removed the old one, just this time in reverse.
Install the Guard
Use your socket wrench to reinstall both the engine and transmission guards. Make sure that you keep the belt in place while installing the guards so that you don’t have to remove them again.
I’ve had to remove the guards a few times because the belt had slipped off, so keep an eye on where the belt is when you’re putting on the guards.
Replace the Shroud
The last thing to reinstall is the shroud. Use your socket wrench to reattach the shroud back onto the lawn mower.
Upright the Lawn Mower & Test
Finally, upright the lawn mower and give it a test run. If you correctly diagnosed and fixed the drive belt, then your lawn mower should be running as fast as it used to.
Tools & Parts Needed to Replace the Drive Belt
- New Drive Belt
- Socket Wrench Set
Replacing the Drive Cable
I’d place the drive cable as the second most common cause of a self-propelled lawn mower moving slowly or the self-propel not working.
So, if you have found problems with your cable, then this is how you can replace it.
Remove Cable from the Drive Lever
First, remove the cable from the drive lever. If you have a newer mower, then it probably has a plastic cover protecting the cable connection.
So, use a screwdriver to remove the cover, then remove the cable from its mounting position.
Remove the Cable from the Cable Clips
Next, remove the cable from the clips along the mower. These are the clips that hold the cable in place to stop it from swinging around.
Remove the Transmission Cover
Now you’ll need to remove the transmission cover from the lawn mower. Some lawn mowers have this on top and some have this underneath.
If yours is underneath, you will need to tilt over the mower. Use your socket wrench set to remove the fixing bolt from the cover, then put it to one side.
Remove the Cable from the Transmission
You should see the other end of the drive cable attached to the mower with the cover removed.
Usually, this cable is held on using a small metal clip that can be pried off using a screwdriver or some needlenose pliers.
Once the clip is removed, you should then be able to remove the cable.
Thread New Cable
Next, take your new drive cable and thread it onto the lawn mower. Just make sure that you thread the cable with the ends in the correct position.
You wouldn’t be the first to clip the cable in backward.
Connect the Cable to the Transmission
You will attach the cable the same way you removed it, but this time in reverse. Once you have the cable attached to the transmission, reinstall the clips and make sure the cable is secure.
Connect the Cable to the Drive Lever
Now the other end of the cable needs to be connected to the drive lever. So, attach it repeating the same steps you followed to remove it, just in reverse.
Once you finish installing the cable to the lever, use your screwdriver to reinstall the covers.
Reclip the Cable
Next, clip the cable back onto the lawn mower using the clips attached to the frame. When doing so, make sure that you don’t put the cable under stress, as this can affect how the cable works and could create a new problem.
Reinstall the Transmission Cover
Finally, grab the transmission cover and reattach it to the mower. That’s it; the drive cable has been successfully replaced.
Once you test the mower, you should find a big improvement in the drive and speed.
Tools & Parts Needed to Replace the Drive Cable
- New Drive Cable
- Needle-Nose Pliers
- Socket Wrench Set
- Screwdriver
Drive Wheel Replacement
Number three on the fix list is the drive wheels. If you find your self-propelled lawn mower moving slow or not at all, finding a problem with the drive wheels is pretty common, especially if the wheels are completely made of plastic.
So, here are the steps you’ll need to follow to replace your drive wheels successfully.
Remove the Wheel Hub
The first step is to remove the hubs from the wheels. These are the covers that hide the axle and nut on the lawn mower.
Next, use a screwdriver to pop off the hub cover. There is usually a small groove to put the screwdriver into to make things easier.
Remove the Axel Bolt
Next, you’re going to remove the axel nut. You can use a socket wrench for this.
Remove the Old Wheel
With the nut removed, the wheel should just pull off. When you get the wheel off, you can throw it into the trash.
Clean Out Wheel Area
With the wheel area exposed, it’s a good opportunity to clean the area. You might find a bit of old broken teeth from the wheels that you’ll need to get rid of.
So, spray some WD-40 onto a cloth and clean the area. While you have the WD-40 in hand, give the pinion sprocket a good coating as well.
Install New Wheel
The next step is to install the new replacement wheel. Then, all you need to do is slide it onto the lawn mower.
Install the Nut & Replace the Hub
The final task is to install the axel nut using your socket wrench and pop on the wheel hub.
If you have purchased an aftermarket wheel, you may find that it doesn’t have a hub cover, so you can skip this part.
Tools & Parts Needed to Replace the Drive Wheel
- Replacement Drive Wheels
- Socket Wrench Set
- Flathead Screwdriver
- Cleaning Cloth
- WD-40
Replacing the Self-Propelled Transmission
Replacing a transmission on a lawn mower isn’t as difficult as it may sound.
The transmission comes complete with the axles and pulleys attached, so it’s just a case of pulling off the old one and installing the new one.
Let’s take a look at the steps you’ll need to follow.
Tilt Over the Mower
First, tilt over the lawn mower the correct way so that the oil doesn’t run into the carburetor and air filter.
Remove the Belt Cover
Next, use your socket wrench to remove the bolts holding the belt cover on. This will give you access to the belt.
Remove the Belt Guards
Next, use your socket wrench to remove the bolts holding on the belt guards for both the engine and transmission.
Remove the Belt
With both guards removed, you should now be able to remove the belt.
Remove the Drive Cable
Now, it’s on to the drive cable. First, you’ll need to remove the cable from the transmission.
I find it best to use a pair of needle-nose pliers to remove the clip holding the drive cable in place.
Once you get the clip off, you can then remove the cable.
Remove the Drive Wheels
Next, it’s time to remove both of the drive wheels. So, take your screwdriver, pop off the wheel hub, and then use your socket wrench to remove the axle bolt.
Remove the Snap Rings and Pinion Gear
Once you remove the wheel, you will see the pinion gear and snap ring. Use a pair of snap ring pliers to remove the pin. Once the pin is removed, the pinion gear should slide right off.
Remove Adjustment Plate
On the side of the lawn mower, you’ll find the bolts that hold the wheel adjustment plate in place.
The cut height adjuster is connected to this plate. You’ll need to remove the bolt, so the plate becomes free from the mower.
A socket wrench should work fine here.
Slide Out the Old Transmission
Finally, that’s everything you need to do to remove the transmission.
So, lift the adjustment plate off the transmission and the axle. Then slide the other axle out of its mounting point.
Slide In the New Transmission
Next, take your new transmission and slide it through its first mounting point like you did when you removed it.
Then lift the adjustment plate and slide it onto the other transmission axle.
Fix the Adjustment Plate
Using your socket wrench, reattach the adjustment plate.
Replace the Pinion Gear & Snap Ring
Before reinstalling the pinion, adding a little grease to the axle is a good idea. This will ensure you get as much life out of it as possible.
Once you’ve greased the axle, slide on the pinion gear and reattach the snap ring using your snap ring pliers.
Once everything is installed, give the pinion gear a spin and make sure that everything is running freely and that the snap pin is secure.
Snap rings can be tricky to get seated correctly, especially if you don’t have the right tool.
Replace the Wheels
Next, you are going to want to reinstall both wheels. So, position the wheels and tighten the nuts to both axles.
Finally, pop on the hub covers if you have them.
Replace the Drive Cable
You are almost finished; there are just a few more bits to do. Next, thread the cable into the transmission and clip it into place using your pliers.
Install the Belt
Grab your belt, slide it over the blade, and then thread it to the pulleys. There should be plenty of slack, so this should be pretty easy.
Replace the Guards & Shroud
The last tool you’ll need is your socket wrench. Start with the guards; getting these on will help hold the belt in place while you work on other things.
So, bolt on the guards making sure the belt stays in the correct position.
Test the Mechanism
Before installing the belt cover, it’s a good idea to test how the transmission moves.
Give the drive lever a pull; the transmission should rotate and take the slack out of the belt.
Cover
Finally, once you have seen the transmission moving correctly, you can go ahead and install the belt cover and test how your mower is running by giving it a go around the yard.
Tools & Parts Needed to Replace the Drive Transmission
- New Drive Transmission
- Socket Wrench Set
- Snap Ring Pliers
- Screwdriver
- Pliers

Leave a Reply