The lawn mower height adjustment lever experiences a lot of wear and tear, and as a result, they often get broken or bent out of shape. And if this lever is broken or bent, it will cause you a real problem when you need to change the height of your cut. I’ve put together a guide to give you a head start on your repair and point out a couple of mistakes for you to avoid.
When You Might Be Able to Salvage a Height Adjustment Lever that’s Not Working Correctly
Adjustment levers are usually made of thin, flexible steel designed to ratchet over teeth at specific points to achieve varying cutting heights. Unfortunately, it‘s common for the lever to become misshapen and loose. So before you head to the store for a replacement, it’s worth tinkering with it first to see if it’s salvageable.
Here are a few instances where a replacement height adjustment lever might not be necessary.
Loose Adjustment Lever
The first item to check is the nut/bolt holding the adjustment lever to the lawn mower. These nuts/bolts usually have an internal nylon washer that stops the nut from backing off. Unfortunately, it’s very common for the nylon washer to get damaged or worn over time. Because of this, they can loosen off and cause the lever not to work as it should.
Bent Adjustment Lever
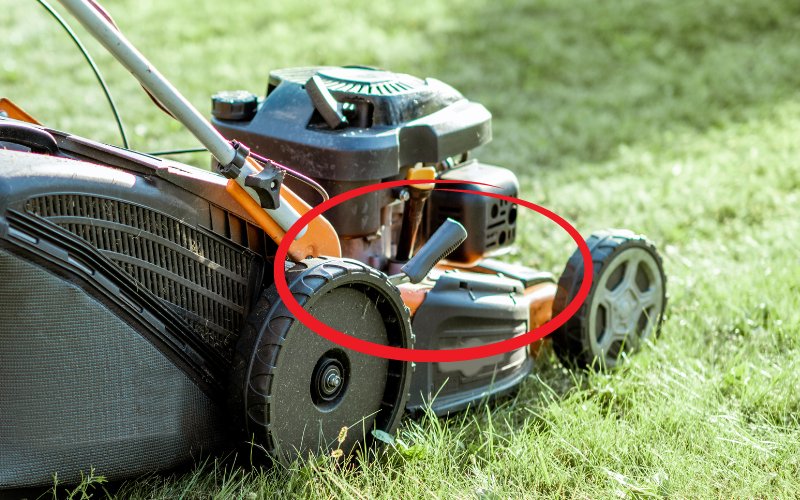
Because the lever is designed to bend on purpose, it’s normal for it to lose its shape after repeated use. However, with the frequent rearrangement over the adjustment teeth, you’ll notice that it doesn’t return the same as it did when it was new. Try removing the adjustment lever and straightening it back into its original shape so it can grip the teeth firmly.
Indexing Pin
If you take a closer look at the mounting of the adjustment lever, you’ll notice there is a specific way it should be mounted. Usually, there is a groove or pin that the lever sits in or over to make sure it is in the correct position. If you have a loose nut/bolt or broken pin, you will more than likely find that the lever is in the wrong place and can’t work correctly.
Height Adjuster Plate
The height adjustment lever works in collaboration with the adjuster plate. The adjuster plate has the teeth that the adjustment lever locks into so that it remains in place. However, if your wheel has had some heavy contact with something like a tree or driveway edge, then it’s pretty likely that the teeth have become bent. As a result, the adjustment lever may not have anywhere to lock into securely. Take a closer look at the adjuster plate to see if this is the case.
Replacing a Lawn Mower Height Adjustment Lever That’s Broken (Step By Step)
If you use your mower regularly, as I do, your adjustment lever will eventually break. The thin steel loses its paint coating easily and then begins to rust very quickly. For example, I tried to adjust the height once, and the lever broke off in my hand because the rust had completely eaten through the metal. When I looked into it, I noticed that a few of the teeth were also missing.
So, if this is the case for you and your lawn mower height adjustment lever is broken, you will need to replace it. Thankfully, this simple fix will only take you a short time. Let’s take a look at the tools and parts you’ll need to collect to get started.
Tools & Parts Required to Replace a Broken Adjustment Lever
- Socket Ratchet
- Replacement Adjustment Lever
- Jack
- Cleaning Rag & WD-40
Get the Mower Into Position and Prepped
With all your parts and tools close by, you’ll want to get the lawn mower into a position where you can work on it safely and easily. I always like to get my lawn mower up on my workbench with a bit of help from a neighbor. Once the mower is in position, remove the ignition cable from the spark plug and tuck it out of the way to prevent any mishaps.
Jack Up the Lawn Mower
Firstly, you need to jack up the lawn mower so that the wheels that adjust the cut height are off the surface. For this, I grab a wood block and place it underneath the front of the lawn mower. This method lifts my wheel off the surface by four or five inches.
Remove the Wheel
Even though adjustment levers come in many different designs, they usually have wheels attached. Start by using your socket ratchet to remove the center bolt so you can lift off the wheel. Next, set the wheel to one side so it can be reinstalled later.
Remove the Adjustment Lever
For this step, you’ll need to take your socket ratchet and remove the mounting nut/bolt. Next, loosen off the bolt/nut and remove it from the lawn mower. Once the bolt/nut is removed, be careful that the adjustment lever doesn’t fall because it is no longer fixed to the lawn mower. Next, pull the lever and set it to one side for later.
Clean Down the Mounting Point
Once all the parts are removed, take the time to clean down the area where the adjustment lever is mounted. This clean-up will guarantee that no obstruction gets in your way when mounting the lever. So grab your cleaning rag and a little WD-40 and wipe down the area.
Inspect the Mounting Point
Once you have finished cleaning down the mounting point, run your eye over the area. Doing this, you’ll want to double-check that everything is in good shape. If you find any rust or misshaped structure, you might need to repair it before installing the new adjustment lever.
Compare the Old and New Levers
Next, look at both the old and new lever to make sure that they are the same and nothing is missing. You may find the old lever has some extra parts that must be salvaged first. Usually, this will be a few wheel washers and bearings. Remove any of the parts that need to be reused and set them to one side.
Install the New Adjustment Lever
Next, take the new lever and place it into position over the fixing points. Using your socket ratchet, install the nut/bolt firmly. With the lever installed, check its operation. You may find that the lever becomes difficult to use if you over-tighten the nut/bolt. If this is the case, back out the nut/bolt a little to make it easier to operate.
You just need to make sure that the lever is securely attached to the lawn mower. This is why nylon nuts/bolts are used so that they remain exactly where they are tightened to.
Install the Wheel
Begin by installing the parts you removed from the old adjustment lever, such as the washers and bearing. Next, take the wheel, place it back onto the shaft, and install the nut/bolt using your socket wrench.
Final Inspection & Lubrication
After you’ve finished installing the new adjustment lever, you will need to give it a test and see how it’s working. First, ask for some help to get the lawn mower back onto the ground if you are working on a bench. Next, try out how the lever is working with the weight of the lawn mower on it. If everything is working well, a final spray of WD-40 on the parts will add some lubrication and protection.
Final, Final Inspection
With any of my repairs, I always like to check the lawn mower after I’ve used it to make sure everything is still good. After the mower has been vibrating for a few hours, it will put your repair work to the test.
So, it’s best practice to check the repair after it’s been put under strain. I have been known to search around the garden for a lost bolt because I hadn’t checked my repair after use.
Mistakes to Avoid
You can avoid a few mistakes when carrying out your repair if you take your time and follow the appropriate steps. Like any repair, it simply won’t work if you do it wrong. So, take your time and avoid these mistakes:
- Not replacing damaged nylon nut/bolt
- Cross threading nuts/bolts
- Forgetting to install all the washers and bearings
- Overtightening fixings
- Leaving junk and debris where new parts are to be installed

Leave a Reply