I always notice a slight scent of gasoline whenever I enter my tool shed, but never anything too bad. Usually, it’s just down to the fact that I have gas cans and several gas-powered tools for the yard stored in the shed.
But if I smell gas too strongly, then I know something is probably leaking. One of the first things I do is check to see if the lawn mower is leaking gas from the carburetor. Nine times out of ten, the cause of the smell is indeed the lawn mower carburetor leaking gas.
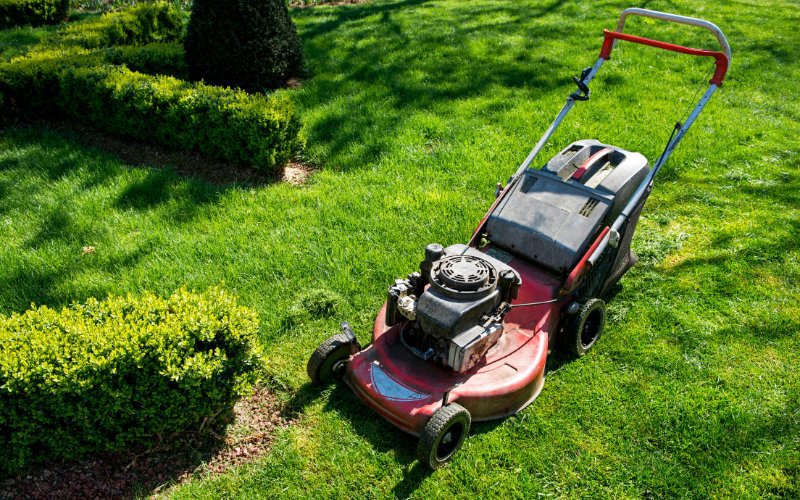
So, let’s go over what you can do if your lawn mower is leaking from the carb.
Why Is My Lawn Mower Carburetor Leaking Gas? (The Short Answer)
Lawn mower carburetors can leak gas in several places due to damage and wear, poor fitting, and lack of servicing. Here are the common areas to inspect when your lawn mower carburetor is leaking gas.
- Carburetor Fuel Bowl & O-Ring
- Carburetor to Engine Connection & Gasket
- Fuel Float Stuck Open
- Primer Bulb Damaged
- Fuel Shut-Off Solenoid O-Ring
- Fuel Line Connection
Lawn Mower Carburetor Leaking Gas? (A Closer Look At The Reasons Why)
If you have a lawn mower spitting gas out of the carb, then you want to diagnose the exact location of the leak. Here are my top causes that can make a carburetor leak.
Carburetor Fuel Bowl & O-Ring
A carburetor fuel bowl is basically a reservoir that holds fuel on the bottom of the carburetor. The fuel bowl needs to be removed to gain access to the fuel float and the jet. To remove the cup, a seal must stop fuel from leaking between the carburetor and the cup.
The use of O-rings on the cup and the mounting bolt creates this seal. If your lawn mower carburetor is leaking gas in this area, it’s likely due to a bad seal caused by a damaged O-ring or an incorrectly installed cup.
So, check that the bowl is secured correctly and that it isn’t loose. Then, use a socket wrench to remove the bowl from the carburetor and inspect both of the O-rings. If the bowl is loose or there is a damaged O-ring, then you’ll have diagnosed the source of the leaking gasoline.
Carburetor to Engine Connection & Gasket
A gasket forms a seal between the carburetor and the engine. This seal ensures there aren’t any gaps for fuel to leak through or for additional air to enter the engine. If your carburetor is loose, then it could have damaged the gasket.
See if you can tighten the carburetor mounting bolts, then check if the lawn mower still leaks gas. If the leaking continues, then you’ll need to remove the carburetor and change the gasket.
Fuel Float Stuck Open
One of the big reasons that lawn mowers leak gas is a stuck float in the open position. Once the gas level goes down in the carburetor fuel bowl, the float lowers and allows the bowl to fill. Once the bowl is full, the float floats up and cuts off the flow.
Unfortunately, the float can stick in the down position because of issues like dirt and fuel gum. When stuck, it allows fuel to flow continually with the force of the fuel pump.
So, grab your socket wrench and remove the fuel bowl from the bottom of the carburetor. Then, lift the float and check if it returns to the down position.
If it takes some effort or it gets stuck in either the up or down position, then you’ll have found the problem. This means you need to remove the float and carry out a fix.
Primer Bulb Damaged
If your lawn mower has a primer bulb attached to the carburetor, the bulb could be damaged and cause a leak. So, give the primer a press and check to see if it leaks. If it does, then you’ll need to replace it.
Fuel Shut-Off Solenoid O-Ring
Some bigger lawn mowers, like zero-turns and tractor lawn mowers, have fuel shut-off solenoids. These solenoids attach to the carburetor fuel cup and hold the float in the up position to stop fuel from being able to flow.
The solenoid uses an O-ring to achieve the seal between the solenoid and the cup. If the solenoid is loose or the O-ring is damaged, then you’ll end up with a leak. So, see if you can tighten the solenoid and stop the leak, or remove the solenoid and check the O-ring. I’d say that if tightening the solenoid doesn’t stop the leak, then there is probably something wrong with the O-ring.
Fuel Line Connection
Over time, fuel lines can become brittle and split due to the corrosive nature of the fuel passing through them. Also, the repeated heating and cooling of the lines as the mower heats up and then cools adds stress to the line.
So, a good place to check if you have a lawn mower carburetor leaking gas is the connection between the carburetor and the fuel line.
Take a close look to see if your lines are damaged in any way and see if this is where the fuel is coming from. If you give the fuel line a bit of a pull it may open a split that you might not normally see. If you do find a leak, then you’ll need to replace the fuel line.
How to Fix a Lawn Mower Carburetor That Is Leaking Gas
Now that you have worked out the location of the gas coming out of the carburetor, it’s time to check out the repairs. Here is how I go about repairing a leak on my lawn mower’s carburetor.
Installing Fuel Bowl O-Rings
First, use a socket wrench to remove the fuel bowl from the lawn mower’s carburetor. Then, remove the bolt from the fuel bowl. Next, you need to remove both of the old O-rings. I usually use an opened-up paperclip to hook these off.
Then, cover your new O-rings in a light coat of oil. This helps them go on easier and last a bit longer. Slide on the O-rings, making sure that they seat correctly and are not twisted. The last thing you want to do is damage a new part by installing them crooked.
Next, reinstall the bolt into the bowl and reattach the bowl to the carburetor. This should stop your lawn mower leaking gas from the carburetor.
Tools & Parts to Replace Fuel Bowl O-Rings
- Socket Wrench
- Hook Tool (Paperclip)
- Replacement Fuel Bowl O-Rings
Replacing a Carburetor Gasket
Lawn mower carburetors come in all different designs and are attached using a variety of methods. So, my example to replace your lawn mower’s carburetor gasket follows a Briggs & Stratton engine, a common engine found on many different lawn mowers and lawn mower designs.
Even if you don’t have a Briggs & Straton, this process gives you a good understanding of what is required. Let’s take a look.
Steps to Replace a Carburetor Gasket
- Remove the spark plug cable and tuck it out of the way
- Remove the bolt securing the air filter cover
- Remove the air filter cover and the air filter
- Remove the screws securing the air filter base
- Remove the air filter base
- Remove the carburetor mounting bolts
- Remove the old gasket
- Wipe down the cylinder head where the gasket sits
- Wipe down the carburetor where the gasket sits
- Thread the carburetor mounting bolts through the carburetor
- Position the gasket onto the carburetor mounting bolts
- Position the carburetor to the engine keeping the gasket in place
- Tighten the carburetor mounting bolts into the cylinder head
- Reattach the air filter base
- Install the air filter
- Install the air filter cover, then secure it in place with the air filter bolts
Tools & Parts Needed to Replace Carburetor Gasket
- Socket Wrench Set
- Cleaning Cloth
- Replacement Carburetor Gasket
Replacing a Carburetor Fuel Float
Again, replacing the carburetor float will all depend on the specific carburetor you have. These steps outline a Briggs & Stratton engine on a push mower. If you have a different lawn mower, especially a bigger lawn mower, you might find that some of the steps are not necessary.
Let’s have a look at the process.
Steps to Replace a Carburetor Float
- Remove the engine cover bolts
- Remove the engine cover
- Remove the spark plug cable and tuck it out of the way
- Remove the bolt securing the air filter cover
- Remove the air filter cover and the air filter
- Remove the screws securing the air filter base
- Remove the air filter base
- Clamp the fuel line to the carburetor
- Remove the spring clip from the fuel line to the carburetor
- Remove the fuel line from the carburetor
- Lift the fuel tank off the lawn mower
- Remove the throttle linkage from the carburetor
- Remove the choke linkage from the carburetor
- Pull the carburetor from the engine
- Remove the fuel bowl bolts
- Remove the fuel bowl
- Remove the pin holding the float in place
- Lift out the float and needle
- Detach the needle from the old float
- Attach the needle to the new float
- Position the float and needle back on the carburetor
- Install the float pin
- Reattach the fuel bowl
- Secure the fuel bowl bolts
- Attach the carburetor to the engine
- Connect the throttle linkage
- Connect the choke linkage
- Attach the fuel tank
- Attach the fuel line
- Reposition the spring clip
- Unclamp the fuel line
- Reattach the air filter and secure it in place
- Install the air filter and air filter cover
- Reposition the engine cover and secure it into place.
- Connect the spark plug
Tools & Parts Needed to Replace a Carburetor Float
- Socket Wrench Set
- Fuel Line Clamp
- Pliers
- Replacement Carburetor Float
Replacing a Carburetor Primer Bulb
For this fix, we’ll be once again taking a look again at a Briggs & Stratton engine on a push mower, like a Snapper. This type of bulb is held in place with a push fitting using two plastic tabs. Now, it’s not particularly difficult to swap out, but it is definitely fiddly.
So, grab two screwdrivers and push each of the plastic tabs that secure the bulb in place. Use one screwdriver for one tab on one side of the bulb and the other screwdriver for the other tab. The aim is to push both tabs at the same time to release the bulb.
Once you manage to free the tabs, you should be able to pull on the bulb and release it from the carburetor. Next, remove the bulb from the bulb mount and install a new rubber bulb. Then, insert the bulb, mount it to the opening where you previously removed it, and give it a good press. You need to make sure that both tabs click back into place. Fiddly, but easy enough to do.
Tools & Parts to Replace a Lawn Mower’s Priming Bulb
- Two Flathead Screwdrivers
- Replacement Primer Bulb
Replacing a Fuel Cut-Off Solenoid O-Ring
If you find a gas leak on your carburetor fuel cut-off solenoid, you’ll first need to disconnect the solenoid power connector. Then, unscrew the solenoid from the fuel bowl. Next, remove the old O-ring and install the new one.
Finally, screw the solenoid back into the fuel bowl and connect the power. Compared to other causes of gas leaks on your lawn mower, this is a super quick fix and can definitely stop a gas leak.
Parts Needed to Replace a Fuel Cut-Off Solenoid O-Ring
- Replacement O-Ring
Replacing a Fuel Line
The most important thing about replacing fuel lines is to make sure that you use the right replacement pipe. A quick trip to the lawn mower store will remove any doubt about getting the right product. So, here is the step you should follow.
Steps to Replace a Damaged Lawn Mower Fuel Line
- Clamp the fuel line between the fuel tank and the fuel pump
- Slide the two spring clips down the damaged fuel line
- Remove the old fuel line
- Remove the spring clips from the old fuel line
- Measure out the new fuel line
- Cut the new fuel line to the required length
- Position both spring clips 2 inches onto the new fuel line at each end
- Connect the new fuel line to the carburetor & fuel pump
- Position the spring clips over the ends of the fuel line
- Remove the fuel clamp
Tools & Materials to Replace a Lawn Mower Fuel Line
- Pliers
- Cutters/Knife
- Measuring Tape
- Fuel Line Clamp
- Replacement Fuel Line

Leave a Reply