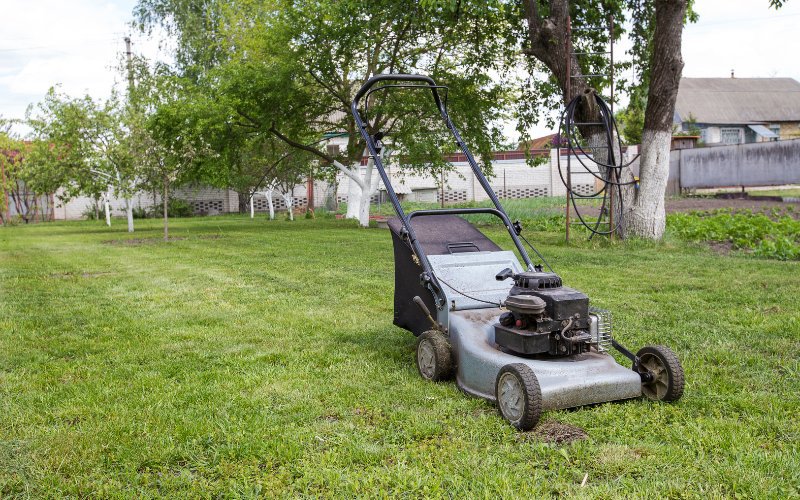
Push lawn mowers seem to have problems with the handlebars. They either break or don’t stay straight. You could grab a roll of duct tape and do a less-than-ideal repair or carry out a sturdy, long-lasting, and safe repair. So instead of spending a fortune on a replacement handle or countless rolls of tape, let’s look at how to fix a lawn mower handlebar the right way.
Why You Might Need to Repair Your Lawn Mower Handle
Lawn mower handlebars are usually made up of three different components. First, the bottom section connects the handlebar to the lawn mower. Second, there’s the top section of the handlebar that you hold. Third, the connection between the two allows you to fold the handlebars for storage. So, let’s quickly look at where these components usually fail.
Bottom Handlebar Section
Out of the three sections of the handlebars, this tends to be the part that actually snaps, making your lawn mower unusable. I have found that the force from pushing the mower and the engine’s vibrations cause this section of the handlebar to become weak and eventually snap. A bit of rust also helps speed up this process.
As a result, the break usually happens between the flat section of the handlebar and the round metal tubing where the handlebar connects to the lawn mower. I’m pretty sure that when these types of handlebars are manufactured, the shaping process weakens the metal, which is why so many people have the same issue.
Top Handlebar Section
The top section of the handlebars handles the pushing and the vibration better, but this doesn’t make it indestructible. On a number of occasions, I’ve seen issues where the flat section of the handlebar that connects to the bottom section of the handlebar snaps. The breakage seems to come from the pushing force of mowing and a loose connection.
Handlebar Connection
If your lawn mower handle is loose and you can’t keep the handlebar straight, then it’s down to the fact there is an issue with the handlebar connection bolts. The cause is usually a worn-out nylon washer inside the nut. Even if you tighten the bolts before mowing, they loosen off, and your handlebars become loose.
So, mowing becomes difficult, and stress is put onto both the handlebars’ top and bottom sections, leading to more damage. Now, this can happen in two different places—the connection between the handlebar and the lawnmower and between the two sections of the handlebar. Usually, the problem occurs more often between the two handlebar sections where you open and close the bar for storage, but the bolts between the lawn mower and the handlebars can also wear out.
How to Fix a Lawn Mower Handle (Repairs for 3 Different Scenarios)
I looked at some Toro parts to see how much buying replacement lawn mower handlebar components cost. The bottom section is about $100, the top section is about $125, and a complete kit of bolts is $20. In my book, that’s pretty expensive. I was hoping to spend around 20 bucks to fix the broken handle on my lawn mower. Instead, I used tools I already had and fixed it for $10.
Does that sound good to you? Well, let me show you how to fix lawn mower handlebars for under $10.
Repairing the Bottom Handlebar Section
The first step is to remove the handlebars from your lawn mower. I needed to remove the bolts from the bottom of the lawn mower handlebar, plus the top handlebar section. You should be able to use a socket wrench to complete this task. Then it’s a trip to the hardware store for a section of new metal pipe.
You will be looking for a length of metal pipe that snuggly fits inside or outside the handlebar. Also, you’ll want to be able to flatten it with a hammer. I found the ideal pipe in the plumbing section at Ace Hardware. Now let’s look at the repair.
Flattening the Pipe
In this step, you are making a new section of the handlebar. Now the bottom section of the handlebar on my lawn mower is flat, so I needed to flatten out my new piece of pipe. I’m guessing this will be the same for you.
You can either use a hammer to flatten the pipe or place it in a vise and flatten it. In my case, I placed the end of the pipe in my vise and squashed it flat. My original handlebar had a 4-inch flat section, so I made sure that I only flattened the same length of pipe.
Clean Up the Broken Handlebar
If you look at the section of the handlebar that you intend to save, you’ll probably notice that it’s no longer nice and round. This is where the handlebar snapped and deformed the pipe. So, use a hacksaw and cut off the end of the pipe. In my case, I only need to remove less than ½ an inch of metal from the end of the pipe. This stage is only really important if you have a new section of pipe that you want to slide inside the handlebars. You might even find that it’s fine already.
Cut the New Pipe to Length
The 4-foot-long pipe I purchased was way too long for the repair, so I needed to cut it to length. So, compare your new pipe length to the handlebar’s good side and see how long you need the pipe to be. I recommend you use as long of a piece of pipe as possible to give the handlebar more strength. Once you have the right length, use your hacksaw again to cut your pipe to length.
Connect the Two Pipes
Next, slide your new pipe inside or over the original handlebar and position it to match the unbroken side of your handlebar. Hopefully, you have something that looks pretty close to the original. Now it’s time to fit everything together and drill some holes.
So, use your electric drill and metal drill bits to drill two holes through both your original handlebar and the new piece of pipe, making sure you keep everything aligned. Position one hole through the bottom end of the pipe and one at the top. Finally, use a washer to thread the bolts through the newly made holes and tighten on the lock nuts.
Drill Out the Flattened Section of Pipe
At this stage, you should have repaired the broken handle on your lawn mower. This last step is to drill a few holes in the flat section of the new pipe so that you can connect the handlebars to your lawn mower. Take the old broken section of the handlebar and trace the holes onto your repair. A sharpie pen should work fine. Then use your electric drill and metal drill bits to drill out the required holes. Finally, install your lawn mower handlebars, and you’re ready to go.
Tools & Material to Repair the Bottom Handlebar Section
- Socket Wrench
- Workbench Vice
- Hacksaw
- Hammer
- Electric Power Drill
- Metal Drill Bits
- Metal Pipe
- Nylon Lock Nut
- Washers
- Sharpie Pen
Repairing the Top Handlebar Section
If you compare both the top and bottom sections of the handlebar where they connect, you’ll see that the bottom section is flat and the top section is rounded. The only difference between the two fixes is the shape of the pipe. You can follow all the same steps as the previous repair and even use the leftover pipe. So, how do you get this rounder shape into the end of your new pipe? Well, I have done this in two different ways.
The first is to place a socket from my socket set in my vise and use it as a mold, and the second is to use a steel pipe that matches the curve in the handlebar. Basically, I hunted around my shed to find something strong that could take a beating and was the right shape. Once I have my mold, I just use my hammer to mold my new pipe into shape. Ok, I cheated a bit and used a heat torch to soften the new pipe.
Extra Tools to Repair the Top Handlebar Section
- Pipe Mold (Metal pipe/ Socket in my case)
- Heat Torch
Repairing the Handlebar Connection
The final lawn mower handle repair is to fix the connections, so they don’t keep loosening off. If you look closely at the nuts in the lawn mower or where the handlebars fold in half, you’ll see that they have an internal nylon washer. So, all you need to do is replace the nuts. The nuts where the handlebar folds will usually come out if you tap the handle.
Failing that, you can discard the handle and replace them with large wingnuts with the same thread and an internal nylon washer. So, remove all the nuts and bolts and head down to the hardware store. Single nuts start at about $0.05, so they are way cheaper than buying a kit from Toro. So with some new nuts, bolts, and a socket wrench, your lawn mower handle repair is complete.
Parts to Repair the Handlebar Connection
- New Nuts as Required
- New Bolts as Required
- Socket Wrench
Things to Be Careful of When Fixing a Mower’s Handle
When fixing a lawn mower handlebar, take your time and be safe. Remember to check where you are cutting and drilling because you only get one chance to get it right. So, measure twice, and cut once. Plus, use any safety gear necessary. Gloves and glasses will definitely save you a trip to the ER.

Leave a Reply